

 Camera self help articles
 Category Widget (Show all)
I use a Nikon 300mm f/4 paired with a Nikon D200 for my bird photography. While shooting, I notice that I do not get a clean background, which I would expect from a prime lens. I have got such a background in one image of mine, however, the subject is a little too soft for my liking (the picture is attached). Is there any way to get a clean background so as to help the viewers focus remain on the subject (the bird in this case)? Could you share a tutorial with us? Im attaching sample images for this case study in JPEG format with full EXIF info.
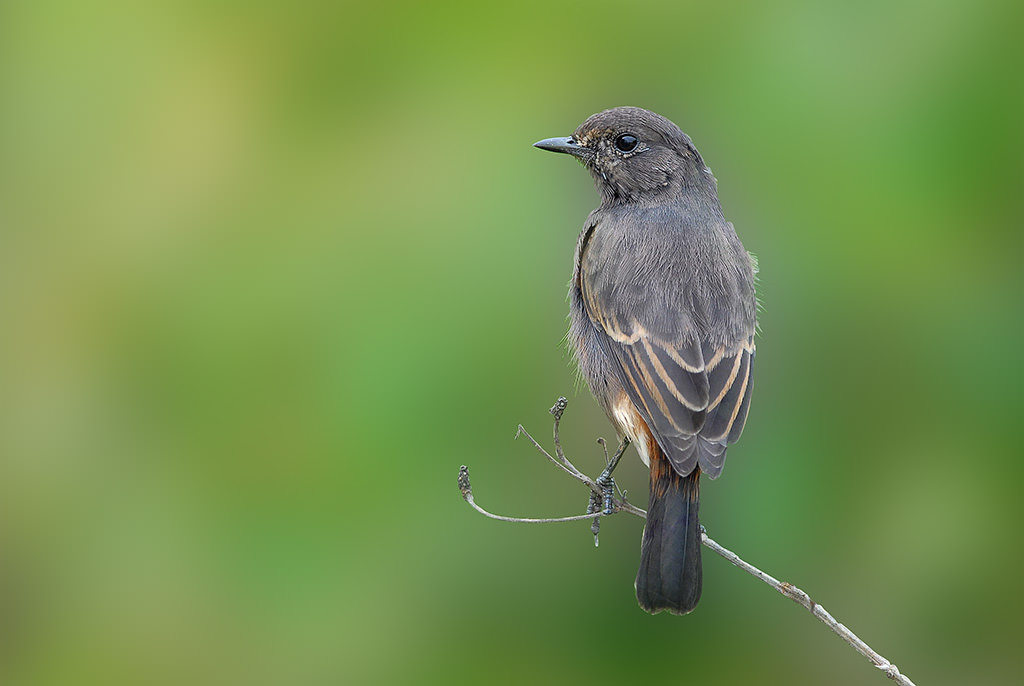
And here are the two images Gaurav attached:

The first image above is cropped, showing a pleasant out of focus background (bokeh) with a slightly blurry bird.

The bird on the second image is sharp, but the background is busy.
So Gauravs question is why does the first image have a nice-looking background, but a blurry bird, while the second image has a sharp bird, but busy background?
Before I talk about the background blur, lets first see why the first image is sharp and the second is not. Looking at the first image, the exposure is 1/350, f/4, ISO 100, while the second image is shot at 1/250, f/4, ISO 200. Both are shot in Aperture Priority Mode using Spot Metering. I am assuming that Gaurav was using a tripod or a monopod to get the above shots, because the shutter speeds are a little low to be hand-held for this lens and camera combo. As I explain in my how to photograph birds article, if you want to get sharp photographs when shooting hand-held, your shutter speed should be at least the total focal length of your lens multiplied by the sensor crop factor. So in this case, Gaurav would approximately need a shutter speed of 1/450 and above to get good results if he hand-held the camera + lens. But this is an approximate suggested value with a good hand-holding technique, one could certainly get sharp results even at lower shutter speeds.
Why did I think that Gaurav used a monopod or a tripod to take the above images? Because the bird on the second photo, as well as the branches on the first photo appear sharp. The source of the problem on the first photo is focus it is not on the bird, but a couple of inches off on the branch. Therefore, the only thing Gaurav could have done better, is reacquire focus and try taking another picture. If the lens he was shooting with has no front/back focus issues, he could have gotten good focus on the bird after several tries.
Lets now talk about the background blur the bokeh on both photographs. Why does the first image have a nice, clean bokeh, while the second photo has a busy bokeh? The explanation here is very simple there was nothing close behind the bird on the first photo, while you can see leaves and branches of a tree behind the second bird. So the problem here is proximity of objects behind the birds. If you want to have a beautiful, creamy bokeh, you should pay attention to four things: focal length of the lens, aperture/depth of field, camera to subject distance and subject to background object distance. The longer the focal length of your lens, the larger the aperture, the closer you are to your subject and the further away your subject is from the background objects, the creamier your bokeh will be. Phew that sounds too darn complex and too long! Basically, try to stay close to your subjects and move them away from the busy background. How could Gaurav have accomplished this on the second photograph? Aside from moving closer towards the bird and filling the frame (which would have probably spooked it), he could have changed the angle. If I see a busy background behind birds, I will move around the bird and try to find a spot that will have the least busy background. It is obviously not always practical, since the bird might not tolerate you walking around it, plus the environment you are in might not be suitable for circling like that. But you hopefully get the point.
The only other thing you can do, is try to fix the image in post-processing. Now this would require some advanced Photoshop skills, but if you have the time and patience in your hands, you can do it with pretty good results.
Here is my quick attempt to clear up the background on the second photo (took me 5 minutes):
And here is what I did in Photoshop:
- Create a duplicate layer
- Select the second duplicated layer
- Select Filter->Blur->Gaussian Blur
- Radius: 125 pixels, Click OK
- Select the second layer and set it to Overlay in the Layers panel
- Pick the eraser and start erasing the bird
- Work on the edges with the eraser tool and get rid of extra branches
- Set the second layer back to Normal
- Merge both layers
- Sharpen the image
- Crop the image
- Resize the image
- Save for Web
Hope this helps. Please let me know if you have any questions!
http://mansurovs.com/case-study-bird-photography
 Recent Articles